Transform Your Outdoor Space: Why A Stained Porch Ceiling Is A Smart Choice
Detail Author:
- Name : Cordell Shields
- Username : osinski.claudie
- Email : ybarton@hotmail.com
- Birthdate : 1982-03-03
- Address : 7852 Magnolia Manor Eloisebury, GA 25723-2186
- Phone : +15208343825
- Company : Borer-Trantow
- Job : Safety Engineer
- Bio : Nostrum repudiandae in eum facere reiciendis dicta. Occaecati quia et fugiat voluptate nihil exercitationem et. Aut sit eum illum a sed rerum.
Socials
twitter:
- url : https://twitter.com/schulist2014
- username : schulist2014
- bio : Exercitationem cumque cumque est eum quis amet. Eaque et sed similique dolorem eum. Repellat in aliquam dolorem et voluptatem iusto.
- followers : 2731
- following : 567
instagram:
- url : https://instagram.com/schulists
- username : schulists
- bio : Est voluptatem dolorem quaerat in omnis ipsa quia. Error minus ea nobis qui et.
- followers : 4974
- following : 2844
tiktok:
- url : https://tiktok.com/@serena_real
- username : serena_real
- bio : Deserunt facere debitis enim hic quos. Modi enim sit et quaerat.
- followers : 4432
- following : 2155
linkedin:
- url : https://linkedin.com/in/serena8974
- username : serena8974
- bio : Sit rem nobis non tempore at consequuntur.
- followers : 3598
- following : 2104
Think about your porch for a moment, that welcoming spot where you relax or greet visitors. The ceiling above you, you know, it plays a really big part in how that space feels. A plain, unprotected surface might seem okay, but a beautifully stained porch ceiling can truly change the whole mood, giving your home a finished, inviting look that people notice.
This idea of making something "stained" for your porch ceiling is about more than just adding a bit of color. It means changing the very appearance of the wood itself, as if a new shade has sunk right into the material. This process, as a matter of fact, affects the wood directly, altering its hue and sometimes its texture, which is pretty neat when you think about it.
A stain, you see, is not just paint sitting on top; it becomes part of the wood, changing its natural shade or giving it a completely new one. It's about letting a color or substance seep into the surface, which, you know, usually shifts its look or tone. This approach offers both a fresh style and a layer of defense for your outdoor living area.
Table of Contents
- What Does a Stained Porch Ceiling Really Mean?
- Why Give Your Porch Ceiling a Fresh Look with Stain?
- Picking the Right Stain for Your Porch Ceiling
- Getting Your Porch Ceiling Ready for Stain
- How to Apply Stain Like a Pro
- Keeping Your Stained Ceiling Looking Good
- Common Questions About Stained Porch Ceilings
- Your Next Outdoor Project
What Does a Stained Porch Ceiling Really Mean?
When we talk about a stained porch ceiling, we are talking about applying a material that changes the wood's color, making it deeper or giving it a completely different look. This process, you know, makes the wood absorb the color, so it becomes part of the surface itself. It is not just a surface coating; the material actually penetrates the wood fibers.
Think about how water can change the look of wood if it just sits there, leaving a mark. That's a kind of staining, but usually, we want to control that change. For a porch ceiling, we use products designed to impart a chosen color, creating a uniform and appealing appearance. This controlled coloring, in a way, protects the wood while making it more attractive.
So, a stained porch ceiling means the wood has taken on a new color or a richer version of its original shade because a special liquid has been absorbed into it. This is different from paint, which just covers the surface. The stain lets the wood's natural grain and texture show through, which is pretty cool, honestly.
Why Give Your Porch Ceiling a Fresh Look with Stain?
There are some really good reasons to think about staining your porch ceiling. It is more than just making things look nice, though that is a big part of it. It is also about taking care of your home and making your outdoor areas last longer. You might be surprised by the benefits, you know, that come from this one project.
Protection from the Elements
Outdoor wood, like that on your porch ceiling, faces a lot from the weather. Sun, rain, and humidity can really do a number on it over time. Water, as a matter of fact, can make unprotected wood surfaces look dull or even start to break down. Staining helps create a shield against these things, keeping the wood strong.
A good stain, you see, helps keep moisture from soaking into the wood, which can stop problems like warping or rotting. It also provides some defense against the sun's rays, which can fade wood color over time. This protection is pretty important for keeping your porch ceiling in good shape for years to come.
So, by applying a stain, you are basically giving your wood a much-needed layer of defense. This means less worry about damage from the elements and a longer life for your porch ceiling. It is a smart move for any homeowner, you know, looking to preserve their outdoor spaces.
Aesthetics and Curb Appeal
Beyond protection, a stained porch ceiling just looks better. It adds a touch of class and warmth that a plain, unfinished surface simply cannot match. You can choose a shade that complements your home's exterior, tying everything together nicely. This really makes your porch feel like an extension of your living space.
A well-chosen stain can highlight the natural beauty of the wood grain, giving your porch a custom, polished appearance. This attention to detail, honestly, makes a big difference in how your home feels to you and to anyone who visits. It is about creating an inviting atmosphere right at your doorstep.
Improving the look of your porch ceiling also boosts your home's curb appeal. This means your house looks more attractive from the street, which is a good thing whether you are staying put or thinking about selling down the road. A stained porch ceiling, you know, just adds that extra bit of charm.
Long-Term Care and Value
Taking the time to stain your porch ceiling is an investment in your home's future. It helps prevent costly repairs down the line by protecting the wood from early decay. This proactive care can save you money and headaches in the long run. It is a bit like preventive medicine for your house, so to speak.
A well-maintained home, including its outdoor features, generally holds its value better. Potential buyers, you know, often appreciate the care shown in details like a stained porch ceiling. It suggests that the home has been looked after, which is a big plus in the real estate market.
So, while it takes some effort upfront, staining your porch ceiling contributes to the overall longevity and appeal of your property. It is a practical step that makes your home more enjoyable now and helps it retain its worth for the future. This really makes sense for anyone who owns a home.
Picking the Right Stain for Your Porch Ceiling
Choosing the right stain for your porch ceiling can feel like a big decision, but it does not have to be confusing. There are a few things to think about, like the kind of stain and the color you want. Making a good choice here, you know, will really affect how your porch looks and how long the finish lasts.
Types of Stain to Consider
When you are looking at stains, you will find a few main types, and each has its own qualities. Knowing these differences can help you pick what is best for your porch ceiling. This choice, you know, depends on the look you want and the amount of protection you need.
- Transparent Stains: These stains offer the least amount of color but let the wood's natural grain show through the most. They provide some protection from moisture but are not the strongest against UV rays. They are great if you love the natural look of your wood.
- Semi-Transparent Stains: These give a bit more color while still allowing the wood grain to be seen. They offer better UV protection than transparent stains and are a popular choice for many homeowners. You get a nice balance of color and natural wood beauty.
- Semi-Solid Stains: These have even more pigment, so they provide a more uniform color and hide more of the wood grain. They offer very good protection against both moisture and sun. If your wood has some imperfections, this type can help cover them up.
- Solid Stains: These are almost like paint, giving a completely opaque finish that hides the wood grain entirely. They offer the most protection from the elements and can be a good option for older, more weathered wood. They are really durable, which is a plus.
Each type has its pros and cons, so think about what matters most for your porch ceiling. Do you want to see the wood grain, or do you need maximum protection? This is a key question, you know, to ask yourself.
Choosing the Perfect Shade
The color of your stain will greatly impact the overall feel of your porch. Light shades can make the space feel open and airy, while darker tones can create a cozy, more intimate atmosphere. Consider your home's exterior color and the surrounding landscape, you know, when making your decision.
Natural wood tones, like cedar or redwood, are often popular for porch ceilings, as they blend well with outdoor settings. Gray or blue hues can also be a neat choice for a modern or coastal look, if that is what you are going for. It is really about finding what fits your personal style and your home's character.
It is always a good idea to test a small amount of stain on an inconspicuous area of your wood, or on a scrap piece, before committing to the whole ceiling. This way, you can see how the color actually looks on your specific wood type. Wood can take stain differently, you know, so a test patch is very helpful.
Getting Your Porch Ceiling Ready for Stain
Proper preparation is probably the most important step when it comes to staining your porch ceiling. If you skip this part, your stain might not stick well or look as good as you want. Taking the time to prepare, you know, will save you effort later on and give you a much better result.
Cleaning the Surface
First things first, your porch ceiling needs to be clean. Any dirt, mildew, or old, peeling finish will stop the new stain from absorbing correctly. You can use a mild cleaner and a soft brush to gently scrub the surface. Make sure to rinse it thoroughly afterwards, so no residue is left behind.
For tougher spots, like mildew, a solution of water and a bit of bleach can help. Just be careful when using it, and protect nearby plants or surfaces. Let the ceiling dry completely, you know, before moving on to the next step. This can take a day or two, depending on the weather.
A clean surface is key for the stain to penetrate and bond properly with the wood. It is like preparing a canvas for painting; you want a fresh, clear base. This step, you know, really makes a big difference in the final look.
Making Repairs and Sanding
Once the ceiling is clean and dry, check for any loose boards, cracks, or rough spots. Make any necessary repairs, securing loose nails or filling small gaps with wood filler. These little fixes, you know, contribute to a smoother, more even finish.
After repairs, a light sanding can help open up the wood grain, allowing the stain to absorb more uniformly. Use a fine-grit sandpaper, like 120 or 150 grit, and sand in the direction of the wood grain. This step is especially helpful if you are dealing with previously stained or weathered wood. You just want to smooth things out a bit.
After sanding, wipe down the entire surface with a tack cloth or a damp rag to remove all dust. Dust can really interfere with stain absorption, so you want the surface to be as clean as possible. This attention to detail, you know, really pays off.
Masking Off Areas
Before you start applying any stain, protect anything you do not want to get stain on. This means covering walls, railings, light fixtures, and any furniture on your porch. Use painter's tape and plastic sheeting for this. It is a simple step, but it saves a lot of clean-up later.
Taking the time to properly mask off these areas ensures clean lines and prevents accidental drips or splatters. It is much easier to spend a little extra time with tape and plastic than to try and remove stain from unwanted surfaces. This is a very practical tip, you know, that everyone should follow.
So, get your tape and plastic ready. This protective layer means you can focus on applying the stain without worrying about making a mess. It is a small but really important part of the preparation process.
How to Apply Stain Like a Pro
Once your porch ceiling is prepped, it is time for the exciting part: applying the stain. This is where your chosen color comes to life, changing the look of your outdoor space. Doing it right means taking your time and using the proper methods. It is not overly difficult, you know, but patience helps.
Tools You Will Need
Having the right tools makes the job much smoother and helps you get a better finish. You will want a good quality brush, a roller, or even a stain pad. Each has its own benefits depending on the type of ceiling and your personal preference. A long handle for rollers is almost a must.
- Brush: Good for detailed work, corners, and getting into grooves. Choose a natural bristle brush for oil-based stains and a synthetic one for water-based stains.
- Roller: Great for covering large, flat areas quickly. Use a roller cover designed for smooth surfaces to avoid too much texture.
- Stain Pad: Offers a smooth, even application and can be good for tongue-and-groove ceilings.
- Drop Cloths: To protect your porch floor and furniture from drips.
- Stir Stick: To thoroughly mix the stain before and during application.
Having everything ready before you start saves you from stopping mid-job. This preparation, you know, makes the whole process much more efficient and less frustrating.
Applying the Stain
Always stir the stain thoroughly before you begin and periodically during application to keep the color consistent. Apply the stain in thin, even coats, working in sections. It is usually best to work with the grain of the wood, if possible. This helps the stain absorb properly and look natural.
Avoid applying too much stain at once, as this can lead to drips or an uneven finish. If you see excess stain pooling, wipe it away with a clean rag before it dries. This is a common mistake, you know, that can be easily avoided with a bit of care.
For tongue-and-groove ceilings, a brush might be better for getting into the grooves first, then using a roller for the wider panels. Work steadily, making sure to cover all areas without overlapping too heavily. This method, you know, helps achieve a really smooth and consistent look.
Drying and Second Coats
After applying the first coat, allow the stain to dry completely according to the manufacturer's instructions. Drying times can vary quite a bit depending on the stain type, humidity, and temperature. Do not rush this step, as it is very important for proper curing.
Once the first coat is dry, assess the color and coverage. If you want a deeper color or more protection, you can apply a second thin coat. Again, make sure it is applied evenly and allowed to dry fully. Sometimes, just one coat is enough, so you know, check the look before adding another.
Patience during the drying process is key to a lasting finish. Rushing can lead to a tacky surface or an uneven appearance. You want the stain to really set into the wood, which takes time. This careful approach, you know, gives the best results.
Keeping Your Stained Ceiling Looking Good
Once your porch ceiling is beautifully stained, you will want to keep it looking great for as long as possible. Regular, simple care can help extend the life of your stain and keep your porch looking its best. It is not a lot of work, you know, just a bit of routine attention.
Periodically, perhaps once a year, give your stained porch ceiling a gentle cleaning. Use a soft brush or a cloth with a mild soap and water solution to remove any dust, cobwebs, or light grime. Rinse it well with clear water afterwards. This keeps the surface clean and bright.
Keep an eye out for any signs of wear, like fading or peeling, especially in areas that get more sun or moisture. When you notice these signs, it might be time for a fresh coat of stain. Reapplying stain every few years, you know, helps maintain its protective qualities and keeps the color vibrant.
This ongoing care is a bit like tending to a garden; small, consistent efforts yield big, beautiful results. Your stained porch ceiling will continue to be a source of pride and enjoyment for many seasons. It is pretty simple, actually, to keep it looking good.
Common Questions About Stained Porch Ceilings
People often have questions when they are thinking about staining their porch ceiling. Here are some common ones that might help you out, you know, as you plan your project.
Is it good to stain a porch ceiling?
Yes, it is generally a very good idea to stain a porch ceiling. Staining provides a layer of protection against moisture, sun damage, and general wear from the elements. This helps the wood last longer and prevents it from looking worn out too quickly. It also really boosts the appearance of your porch, giving it a finished and inviting feel.
What is the best color to stain a porch ceiling?
The best color really depends on your personal taste and the overall look of your home. Natural wood tones like cedar or redwood are often popular because they create a warm, classic feel. Lighter shades can make the porch feel more open, while darker ones can create a cozy atmosphere. Consider your home's exterior colors and how much light your porch gets, you know, when choosing.
How do you prepare a porch ceiling for staining?
Preparing your porch ceiling involves a few key steps. First, clean the surface thoroughly to remove any dirt, mildew, or loose bits of old finish. You can use a mild cleaner and rinse well. Next, make any necessary repairs to the wood, like filling small cracks. Finally, do a light sanding to help the stain absorb evenly, and then wipe away all dust. This prep work, you know, is really important for a good outcome.
Your Next Outdoor Project
Giving your porch ceiling a fresh stain is a project that offers both beauty and practical benefits for your home. It protects your wood, adds a touch of elegance, and can even boost your property's overall appeal. As we look towards the spring of 2024, it is a perfect time to consider this kind of outdoor update.
From choosing the right shade to applying it with care, each step contributes to a lasting and lovely finish. You can learn more about outdoor wood care on our site, which might give you more ideas. And if you are curious about other ways to spruce up your home's exterior, you can also link to this page for more home improvement tips.
So, why not consider making a stained porch ceiling your next home improvement venture? It is a rewarding effort that will make your outdoor living area feel more welcoming and protected for years to come. For more details on protecting your home's exterior wood, consider checking out resources like Wood Magazine's guide to wood stain types. You will be glad you did, you know, once you see the finished look.
Wood Stained Porch Ceiling | Shelly Lighting

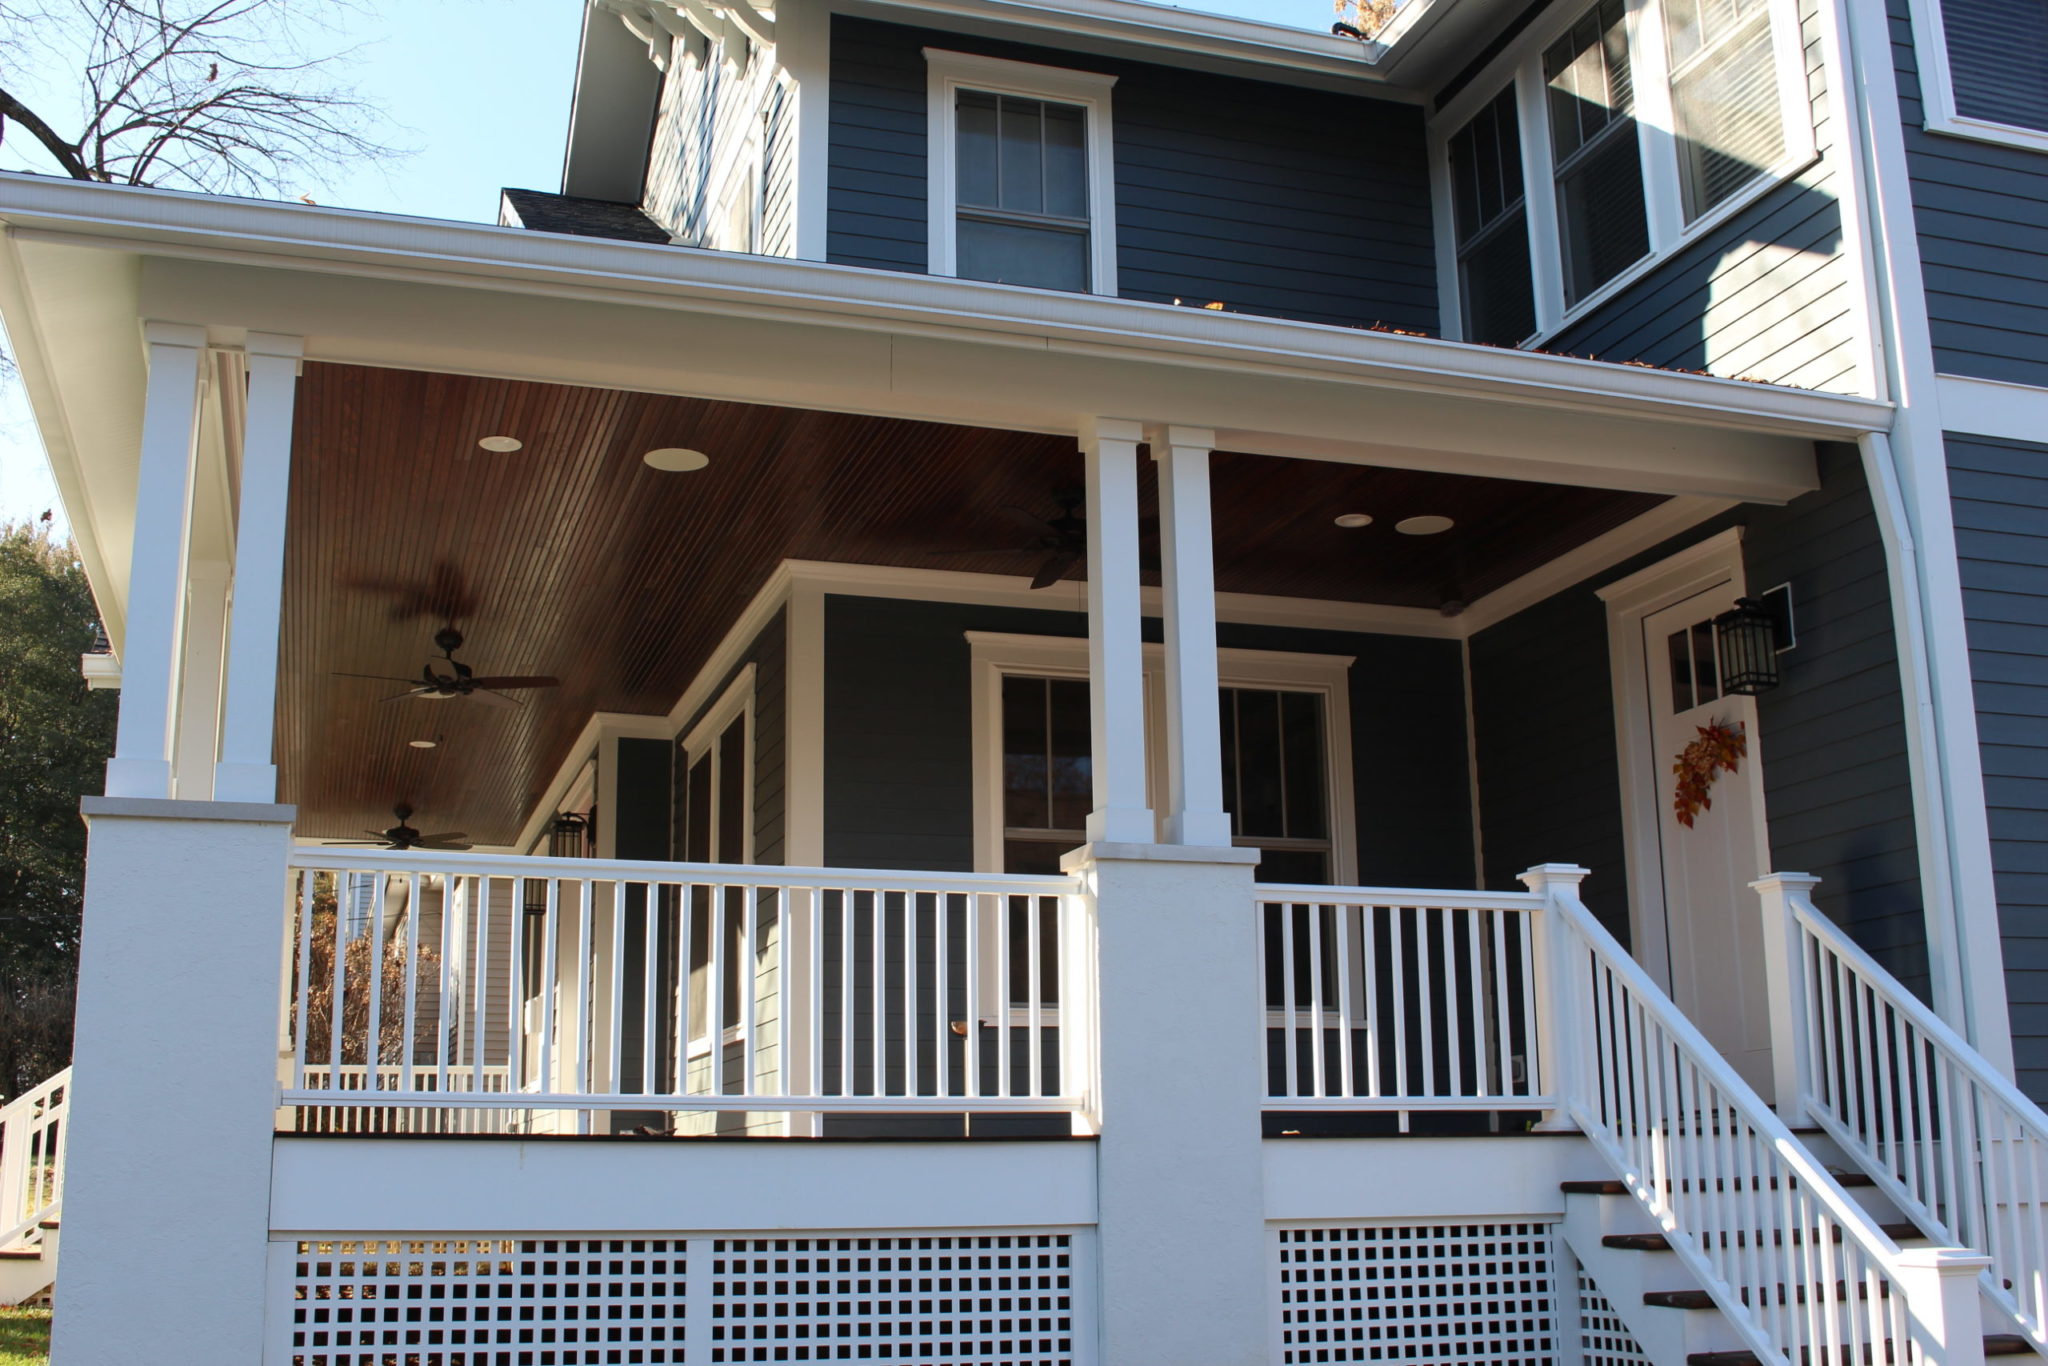
Tongue and Groove Redwood Stained Porch Ceiling

Stained Beadboard Porch Ceiling | Homeminimalisite.com
