Sharpie Pumpkin Designs: Simple Ideas For Fall Fun This Year
Detail Author:
- Name : Mylene Pouros
- Username : gina05
- Email : kessler.michel@muller.info
- Birthdate : 1972-08-10
- Address : 95916 Huels Shoal Suite 006 Cecilestad, DC 93995-9505
- Phone : (781) 520-8601
- Company : Wyman-Fritsch
- Job : Precision Printing Worker
- Bio : Et dolor pariatur sequi exercitationem. Sed voluptatum eum rerum et non sequi ducimus architecto. Laborum exercitationem sit vero magni.
Socials
facebook:
- url : https://facebook.com/erdmanm
- username : erdmanm
- bio : Nulla sapiente officiis dolor sapiente commodi nostrum.
- followers : 5622
- following : 346
tiktok:
- url : https://tiktok.com/@merdman
- username : merdman
- bio : Vitae nobis et fuga et tempore id exercitationem.
- followers : 2400
- following : 1205
Fall brings so much to enjoy, and for many, that means getting pumpkins ready. Carving can be a bit messy, and sometimes, frankly, it is just a little difficult. But what if you could make amazing pumpkin art without any knives? This is where sharpie pumpkin designs come into the picture. People are finding that using permanent markers on pumpkins offers a creative way to decorate, making the process cleaner and often more enjoyable for everyone involved, particularly for families with young children. It is a fantastic way to bring out your artistic side this season, and it is almost something anyone can do.
A lot of people are looking for ways to decorate their pumpkins that last longer than traditional carved ones. Carved pumpkins, you know, tend to go bad pretty fast. They get soft, and then they start to look a bit sad. Permanent markers, however, let you put down a design that stays put. This means your decorated pumpkins can sit on your porch or inside your home for a good while, showing off your work for a longer period. It is a practical choice for folks who want their fall decorations to stand strong.
The appeal of using markers on pumpkins is quite clear. It is a safe way for kids to get involved, as there are no sharp tools around. Plus, the variety of colors and tip sizes available means you have many options for your creations. Sharpie, for example, offers a wide selection of permanent markers, pens, and highlighters. They are made for precision and performance, which helps a lot when you are trying to make a detailed picture on a round surface. This method opens up a whole world of possibilities for your autumn displays.
Table of Contents
- Why Sharpies Are Great for Pumpkins
- Getting Your Materials Ready
- Simple Sharpie Pumpkin Design Ideas
- Tips for a Great Sharpie Pumpkin Experience
- Frequently Asked Questions About Sharpie Pumpkins
- Making Your Pumpkin Visions Real
Why Sharpies Are Great for Pumpkins
Sharpie markers are a popular choice for many art projects, and they really shine when it comes to decorating pumpkins. One big reason is their ability to make bold, clear marks. The ink goes on strong, and it shows up well against the pumpkin's surface. This means your designs will stand out, which is what you want for a festive decoration. They are known for leaving brilliant impressions, and that is very true on a pumpkin too.
Another benefit is the ink's ability to resist water and fading. Once your design is on the pumpkin, it stays there. You do not have to worry about a little rain washing your art away, or the sun making the colors disappear quickly. This makes them an ideal tool for outdoor decorations, which is where many pumpkins end up, isn't it? It is quite a reliable tool for this sort of thing.
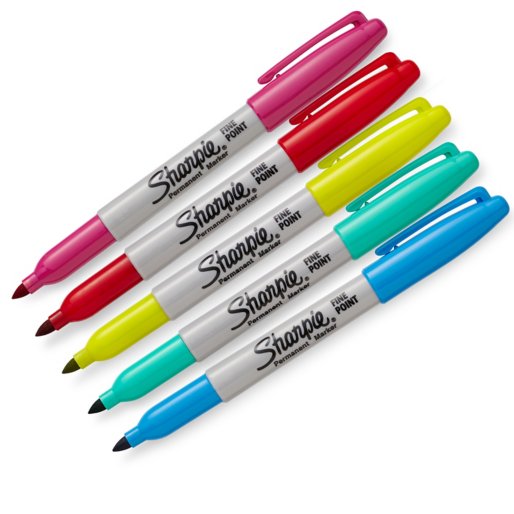
Sharpie offers a wide selection of colors, which is really helpful for creative projects. With 49 unique, vibrant colors available, you have a huge palette to work with. The fine point marker, for instance, comes in 41 colors, plus 5 neon colors and 3 metallic colors. This range lets you add a lot of detail and color variety to your sharpie pumpkin designs. You can find a perfectly curated collection to fit your creative needs, basically.
Getting Your Materials Ready
Before you start making your pumpkin a work of art, you need to gather a few things. Having everything ready beforehand makes the process smoother and more enjoyable. It is like preparing for any fun activity; a little planning helps a lot. You want to be sure you have all your bits and pieces in one place.
Choosing the Right Sharpies
For pumpkin decorating, different Sharpie markers can give you different effects. The standard fine point markers are good for outlines and smaller details. They allow for precision, which is helpful when you are trying to draw something specific. You can get these in many colors, as mentioned, so you have plenty of choice.
For filling in larger areas or making bolder statements, the chisel tip or even the larger magnum markers could be a good idea. These markers lay down more ink, making quick work of bigger sections of your design. Sharpie also has twin tip markers, which offer two different points on one marker, giving you more versatility. They come in 20 colors, which is still a good selection.
Consider getting a variety of colors and tip sizes. This way, you are prepared for any design idea that comes to mind. Having a mix means you can do fine lines, broad strokes, and everything in between. It is pretty much about having the right tool for the job, you see.
Preparing Your Pumpkin
The first step with your pumpkin is to clean it. Pumpkins often have dirt or grime from the patch. Use a damp cloth to wipe down the outside surface. Make sure to get rid of any loose bits of dirt. A clean surface helps the marker ink stick better and look its best. It is a simple step, but it really makes a difference.
After cleaning, let the pumpkin dry completely. If the surface is wet, the marker might not go on smoothly, or the ink could bleed a bit. A dry surface allows for crisp lines and clear colors. You want the pumpkin to be ready to take the ink well, so patience here is a good thing.
Some people like to lightly sketch their design on the pumpkin with a pencil first. This gives you a guide to follow with your Sharpie. Pencil marks are usually easy to erase if you make a mistake, or they will just be covered by the marker. This can be very helpful for complex sharpie pumpkin designs, or if you are not quite sure about your drawing skills. It is a good way to plan your art, basically.
Simple Sharpie Pumpkin Design Ideas
There are so many things you can draw on a pumpkin with a Sharpie. The ideas can range from very simple to quite detailed, depending on how much time and effort you want to put in. It is about letting your imagination lead the way, you know.
Classic Patterns and Shapes
Simple patterns can look very effective on a pumpkin. Think about drawing polka dots of different sizes and colors all over the pumpkin. You could also create stripes, either vertical, horizontal, or even wavy ones. Checkerboard patterns are another idea that can look quite striking, especially with contrasting colors. These designs are often easy to do, and they make a big visual impact, too it's almost a quick win.
Geometric shapes like triangles, squares, or circles can also be repeated to make interesting patterns. You could draw a spiral that goes from the top of the pumpkin all the way down. Or, perhaps, create a mosaic look by drawing many small, irregular shapes and coloring them in. These kinds of designs allow for a lot of repetition, which can be very calming to create, in a way.
Nature-inspired patterns are always a good choice for fall. You could draw simple leaves, acorns, or small branches. Spiderwebs are a classic for Halloween, and they are quite easy to draw with a fine point Sharpie. Stars and moons can give your pumpkin a nighttime feel. These sorts of designs really fit the season, you know.
Character Creations
Bringing characters to life on your pumpkin can be a lot of fun, especially for kids. You could draw funny faces, scary faces, or even friendly monster faces. Think about drawing a witch's hat and some spooky eyes, or a happy ghost shape. These kinds of designs can make your pumpkin have a bit of personality, which is nice.
Popular cartoon characters or animals are also good subjects. You could draw a cat, an owl, or a fox. For something a bit more whimsical, maybe a gnome or a fairy character. The smooth writing of Sharpie markers helps you get those character details just right. It is a chance to let your favorite characters join your fall decorations, basically.
If you are feeling a bit more artistic, you could try drawing a whole scene on your pumpkin. Imagine a haunted house with bats flying around, or a friendly pumpkin patch with little scarecrows. These detailed character creations can turn your pumpkin into a story, which is pretty neat. You can really get into the narrative with these, apparently.
Inspirational Messages and Words
Using your Sharpie to write words or messages on your pumpkin is a simple yet powerful way to decorate. You could write "Happy Fall," "Welcome," or "Trick or Treat." These messages instantly convey a feeling or a greeting. Different fonts or lettering styles can change the whole look of the words, too.
Think about writing a short quote that means something to you, or a phrase that fits the autumn season. Words like "Give Thanks" or "Harvest Blessings" can add a warm touch to your decorations. You can use different colors for different words, or even outline words in one color and fill them in with another. This allows for a good bit of creative expression, really.
You can also combine words with simple drawings. For example, write "Boo!" and draw a small ghost next to it. Or write "Autumn Leaves" and draw a few leaves around the text. This combination makes the design more visually interesting. It is a way to make your pumpkin speak, in a way, which is kind of cool.
Tips for a Great Sharpie Pumpkin Experience
To make sure your sharpie pumpkin designs turn out as you hope, a few simple tips can help a lot. These pointers are about making the process easier and the results better. It is about getting the most out of your creative time, you know.
Drawing Your Design
When you start drawing with your Sharpie, begin with lighter pressure. You can always go over lines to make them bolder. This helps if you are a bit unsure about your design, as it gives you a chance to adjust. Remember, Sharpie permanent markers are designed for brilliant impressions, so even light pressure can make a mark.
If you are doing a complex design, work from the top of the pumpkin down. This helps prevent smudging your work as you go. Your hand will not drag across areas you have already colored. This method helps keep your design clean and crisp. It is a practical approach, pretty much.
For large areas you want to color in, use broad strokes. For smaller details, switch to a fine point marker. This use of different marker tips makes your work look more polished. Sharpie markers are offered in a variety of specialty tips, which helps with this kind of work. It is about using the right tool for each part of the picture, basically.
Making Your Design Last
While Sharpie markers resist water and fading, you can add an extra layer of protection to your pumpkin art. Once your design is completely dry, you might consider applying a clear sealant spray. This spray creates a protective barrier over the ink. It helps keep your design looking fresh for even longer. You can find these sprays at most craft stores or hardware shops, too.
When applying the sealant, do it in a well-ventilated area. Follow the directions on the spray can for the best results. A light, even coat is usually all you need. This extra step is especially good if your pumpkin will be outside, where it faces the elements. It is about giving your hard work a bit of extra staying power, you know.
Even with a sealant, try to keep your decorated pumpkin out of direct, harsh sunlight for very long periods. Extreme heat can sometimes affect the pumpkin itself, which might eventually affect the design. Placing your pumpkin in a shaded spot or bringing it indoors at night can help it last even longer. It is about caring for your creation, essentially.
Frequently Asked Questions About Sharpie Pumpkins
People often have questions about using Sharpies on pumpkins. Here are some common ones, with some answers to help you out.
Can you draw on pumpkins with Sharpie?
Yes, you absolutely can draw on pumpkins with Sharpie markers. Their permanent ink makes them a good choice for this type of surface. The ink goes on well and tends to stay put. Many people find this method a lot easier than carving, honestly.
What kind of markers can you use on pumpkins?
Permanent markers like Sharpies are the best kind to use. Their ink is designed to adhere to surfaces like pumpkins and resist water and fading. Other types of markers, like washable ones, might not stay on or could run if they get wet. You want something that leaves bold, detailed marks that last, basically.
How do you seal Sharpie on a pumpkin?
After your Sharpie design is completely dry, you can use a clear acrylic sealant spray. These sprays are often found in craft stores. Just spray a light, even coat over your design in a place with good air flow. This step helps protect the ink from the elements and makes your design last longer. It is a good way to preserve your art, you know.
Making Your Pumpkin Visions Real
Using Sharpie markers for your pumpkin decorations is a fun, easy, and creative activity for the fall season. It offers a way to get unique designs that last longer than carved pumpkins. With a wide range of colors and tip sizes, Sharpie gives you the tools to make almost any idea come to life on your gourd. Whether you are creating simple patterns, drawing fun characters, or writing meaningful messages, the process is straightforward and rewarding, too it's almost a perfect craft for this time of year.
The durability of Sharpie ink, which resists water and fading, means your artistic efforts will be on display for a good while. This is a big plus for outdoor decorations, which is where many pumpkins spend their time. Just remember to clean your pumpkin, let it dry, and maybe add a sealant for extra protection. These small steps help ensure your sharpie pumpkin designs look great for a long time.
So, as the days get shorter and the air gets crisp, consider picking up some Sharpie markers and a pumpkin. It is a fantastic way to add some personal flair to your autumn decor. You can find out where to buy your Sharpie markers, pens, and highlighters at many stores. Get ready to bring your creative pumpkin visions to life this year, and enjoy the process. It is a really satisfying way to celebrate the season, you know.

Sharpie Chisel Tip Permanent Markers Set 8 Assorted Colors

Sharpie Packaging Refresh — Portfolio
Collections | Sharpie
