Mastering The Polygon Tool In Illustrator: Your Guide To Precise Shapes
Detail Author:
- Name : Gia Hansen
- Username : gudrun.huel
- Email : heath.senger@gmail.com
- Birthdate : 2002-03-27
- Address : 72556 Sawayn Shoal Joanieshire, RI 85739-2047
- Phone : +1 (520) 595-7712
- Company : Grady Group
- Job : Drilling and Boring Machine Tool Setter
- Bio : Quos provident ullam quae ducimus et architecto. Et nihil aliquam vel. Ab iste sequi dolor dolore nulla dolores.
Socials
linkedin:
- url : https://linkedin.com/in/hilbert.kihn
- username : hilbert.kihn
- bio : Explicabo est recusandae iste iste minima.
- followers : 1552
- following : 1255
tiktok:
- url : https://tiktok.com/@hkihn
- username : hkihn
- bio : Accusantium eum doloremque voluptatem fugit eaque vel.
- followers : 1517
- following : 439
facebook:
- url : https://facebook.com/hilbert_real
- username : hilbert_real
- bio : Praesentium doloribus quos at vel.
- followers : 2355
- following : 2067
twitter:
- url : https://twitter.com/kihnh
- username : kihnh
- bio : Dolorem et aperiam velit. Earum est eum repellendus placeat recusandae. Sint dolor accusamus voluptas. Numquam iusto sapiente alias est earum.
- followers : 3443
- following : 1038
instagram:
- url : https://instagram.com/hilbert_kihn
- username : hilbert_kihn
- bio : Aliquam aut minus et sit voluptas sit magnam. Sint harum consectetur laborum itaque iure.
- followers : 1977
- following : 2954
Do you ever find yourself looking at amazing digital art, perhaps in a video game you love or a sleek website, and wonder how those perfectly shaped geometric elements come to life? Well, a lot of that visual magic often starts with a very humble yet powerful feature: the polygon tool in Adobe Illustrator. This little helper lets you make shapes with exact sides, and it's a bit of a cornerstone for many kinds of design work. It helps bring order and a clean look to your creative projects, so it's really quite useful.
Illustrator, as you might know, is a favorite program for folks who make graphics, illustrations, and all sorts of visual things. The polygon tool is one of its core shape-making options, right there with the rectangle and circle tools. It allows you to draw multi-sided figures, from simple triangles to complex shapes with many edges. Knowing how to use it well can make a big difference in the quality and precision of your designs, so it's a good thing to learn.
This guide will walk you through everything about the polygon tool, from finding it to using its more advanced settings. We'll explore how it can help you craft stunning geometric patterns, create modern logos, or even build elements for low-poly art, which is actually quite popular these days. You'll get to see just how versatile this tool is for all your creative ideas, so just keep reading.
Table of Contents
- What is the Polygon Tool in Illustrator?
- Advanced Tips for Using the Polygon Tool
- Creative Applications of Polygons in Design
- Troubleshooting Common Polygon Tool Issues
- Frequently Asked Questions (FAQs)
What is the Polygon Tool in Illustrator?
The polygon tool in Illustrator is a shape-drawing feature that lets you make regular polygons. A regular polygon, as you might remember from school, is a shape where all its sides are the same length, and all its angles are equal. Think of a perfect triangle, a square, or a hexagon; these are all regular polygons. This tool gives you a simple way to make these shapes with great accuracy, which is pretty handy.
When you use this tool, you can decide how many sides your shape will have. This means you can draw anything from a three-sided triangle to a shape with many, many sides, which starts to look almost like a circle. It's a quick method to get precise geometric figures onto your artboard, and it actually saves a lot of time compared to drawing each side by hand.
This tool is, in a way, a fundamental building block for many digital creations. Just as Polygon, the media company, brings you the latest insights into video games and digital culture where precise visuals are key, the polygon tool in Illustrator helps create those very elements with great accuracy. It's a foundational piece of the digital art puzzle, so it really helps.
Finding the Tool
Finding the polygon tool in Adobe Illustrator is pretty straightforward. You'll usually spot it in the Tools panel, which sits on the left side of your screen by default. It shares a spot with other shape tools, like the rectangle and ellipse tools. You might see a rectangle icon there at first, but if you click and hold on that icon, a small menu will pop out, showing you the other hidden shape tools, and there you'll find the polygon tool.
Once you see the polygon icon, which looks like a hexagon, just click on it to select it. Your cursor will then change, showing that the tool is active and ready for you to draw. It's almost always in the same place, so it's easy to remember where it is.
Basic Drawing Techniques
To draw a polygon with the tool, you just click on your artboard and drag your mouse. As you pull, you'll see the polygon appear and grow. If you want to keep the shape perfectly proportioned, you should hold down the Shift key on your keyboard while you drag. This makes sure all sides stay equal and the shape doesn't get squished or stretched, which is very helpful for accuracy.
If you want to draw from the center outwards, hold down the Alt (or Option on a Mac) key as you drag. Combining Shift and Alt/Option will give you a perfectly regular polygon that expands from the point where you first clicked. This can be quite useful for placing shapes precisely in your design, so it really helps with placement.
Advanced Tips for Using the Polygon Tool
While basic drawing is simple, the polygon tool has more to offer for those who need extra control. You can get very specific about your shapes, which is pretty neat. These advanced methods let you fine-tune your polygons for all sorts of design needs, so they're worth knowing.
Controlling Sides and Radius
Instead of just clicking and dragging, you can click once on your artboard with the polygon tool selected. This action will open a dialog box. In this box, you can type in exact values for the "Radius" and the "Number of Sides." The radius sets the size of your polygon, and the number of sides, well, sets how many sides it will have. This is a very precise way to create your shapes.
For example, if you need a perfect hexagon that's exactly 50 pixels across, you can type in 50 for the radius and 6 for the sides. This method guarantees accuracy, which is super important for technical drawings or when you need shapes to fit together just right. It's a bit like telling the tool exactly what to do, and it does it, so it really works.
Creating Stars and Complex Shapes
The polygon tool is closely related to the star tool, which is often found in the same hidden menu. While the polygon tool makes shapes with straight, equal sides, the star tool lets you create star shapes with points. You can adjust the number of points and their depth, which is pretty cool.
You can also use the polygon tool as a starting point for more complex designs. Once you've drawn a polygon, you can use other Illustrator features, like the Direct Selection tool, to move individual points, or the Pathfinder panel to combine or subtract shapes. This allows you to transform a simple polygon into something much more intricate, so it's a good base.
Aligning and Distributing Polygons
After you create several polygons, you might want to arrange them neatly. Illustrator has an Align panel that's very helpful for this. You can select multiple shapes and then use the align options to line them up perfectly along their tops, bottoms, centers, or sides. This ensures a clean and organized layout, which is actually quite important for professional-looking work.
The Distribute options in the same panel help you space out your shapes evenly. If you have a row of polygons, you can tell Illustrator to make sure the gaps between them are all the same. This attention to detail makes your designs look polished and well-thought-out, and it's a bit of a time-saver, too.
Creative Applications of Polygons in Design
Polygons are not just basic geometric forms; they are incredibly versatile building blocks for many different design styles and projects. From abstract art to functional web elements, their clean lines and predictable forms make them a favorite among designers. It's almost surprising how much you can do with them, so they're really quite useful.
Geometric Patterns and Backgrounds
One popular use for polygons is creating striking geometric patterns. By repeating and rotating polygons, you can build intricate and visually appealing backgrounds for websites, posters, or digital art. Think of tessellations, where shapes fit together without any gaps or overlaps; polygons are perfect for this. You can play with different colors and opacities to add depth and interest, which is very effective.
These patterns can be subtle or bold, depending on your design needs. They provide a modern and clean aesthetic that many people find attractive today. It's a relatively simple way to add a lot of visual punch to a project, so it really makes a difference.
Low-Poly Art and Illustrations
Low-poly art is a style that uses a small number of polygons, often triangles, to create a simplified, faceted look. This style is very popular in video games, 3D modeling, and digital illustrations. The polygon tool is, of course, essential for this kind of art, as it helps you make the base shapes. You might use many small triangles to form a character or a landscape, giving it a distinct, angular appearance.
This style can give a sense of depth and dimension while keeping a somewhat abstract feel. It's a creative way to represent complex subjects using basic geometric forms, and it's actually quite trendy. Many artists enjoy the challenge of simplifying forms into polygons, so it's a fun style to try.
Logo Design and Branding
Many successful logos use geometric shapes for their clean, memorable, and strong appearance. Polygons, with their clear lines and defined edges, are an excellent choice for logo design. They can represent stability, precision, and modernity. A well-designed polygon-based logo can be easily scaled without losing quality, making it suitable for everything from business cards to large billboards.
Think about how many company logos incorporate triangles, hexagons, or other multi-sided shapes. They offer a sense of structure and balance, which is very appealing in branding. Using the polygon tool, you can quickly experiment with different forms to find the perfect symbol for a brand, so it really helps with ideation.
Web Design Elements
In web design, polygons can be used for various elements, such as icons, buttons, or background shapes. Their crisp edges make them look good on screens of all sizes, and they can be easily optimized for web use. For instance, you could design a set of hexagonal social media icons or create a unique arrow shape using a triangle.
The clean nature of polygons also means they often contribute to a website's overall user experience, making navigation clear and visuals appealing. They can add a bit of modern flair to a site without making it look too busy, so they're a pretty good choice for web work.
Troubleshooting Common Polygon Tool Issues
Even with a simple tool like the polygon tool, you might run into a few little hiccups. Knowing how to fix common problems can save you time and frustration, so it's a good idea to be prepared. Most issues are actually pretty easy to sort out, so don't worry too much.
Shapes Not Appearing Correctly
Sometimes, you might draw a polygon, and it just doesn't look right. Maybe it's too small, or it has too many sides, or it seems invisible. One common reason for this is that your fill or stroke color might be set to "None." If your shape has no fill and no stroke, it will be there, but you won't see it. Check your Color panel or the Tools panel to make sure you have a visible color selected for either the fill or the stroke.
Another reason could be that you accidentally clicked and released the mouse too quickly, creating a tiny polygon you can't see. Try zooming in or drawing a larger shape to test it out. Also, make sure you're on the correct layer in your Layers panel, so you're not drawing on a hidden layer, which is a common mistake.
Precision Problems
If your polygons aren't as precise as you'd like, there are a few things to check. First, remember to use the Shift key to constrain proportions when dragging. This is the simplest way to get a perfectly regular shape. If you need exact dimensions, always use the click-to-open-dialog-box method, where you can type in the radius and number of sides. This removes any guesswork, which is very helpful.
Also, ensure that your Smart Guides (View > Smart Guides) are turned on. These guides provide real-time feedback as you draw, helping you align shapes and find centers, which is actually quite useful for precision. You can learn more about graphic design on our site, which often covers precision tools. Sometimes, just slowing down a little and being deliberate with your clicks and drags can make a big difference, so take your time.
Frequently Asked Questions (FAQs)
Can I change the number of sides on a polygon after drawing it?
Once you've drawn a polygon, you can't directly change the number of sides using a simple slider or option for that specific shape. However, you can select the polygon and then go to Object > Shape > Expand Shape. This will convert it into a regular path. After that, you could use the Direct Selection tool to add or remove anchor points, or you might just draw a new polygon with the desired number of sides and replace the old one. It's often easier to redraw if you need a completely different side count, so just start fresh.
How do I make a perfect equilateral polygon?
To make a perfect equilateral polygon, which means all its sides and angles are equal, there are two main ways. The easiest is to select the polygon tool, click once on your artboard to open the dialog box, and then simply type in the desired "Radius" and "Number of Sides." Illustrator will then create a perfectly equilateral polygon for you. Alternatively, if you prefer to drag, select the polygon tool, then click and drag while holding down the Shift key. This will constrain the proportions and give you an equilateral shape as you draw, which is pretty handy. You can explore more Illustrator tips here.
What's the difference between the Polygon Tool and the Star Tool?
The main difference between the polygon tool and the star tool is the shape they create. The polygon tool makes regular polygons with straight, equal sides and no inward points, like a hexagon or an octagon. The star tool, on the other hand, creates shapes with outward points, like a traditional star. With the star tool, you can also control the number of points and the two different radii (inner and outer) to make the points longer or shorter. They are both geometric shape tools, but they serve different design purposes, so they're used for different things.

Polygon Definition 3rd Grade
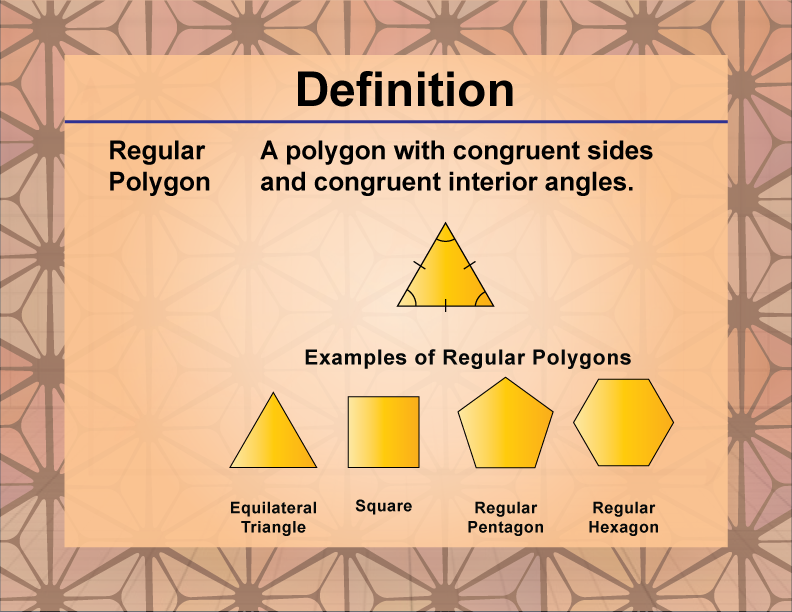
Definition--Polygon Concepts--Regular Polygon | Media4Math
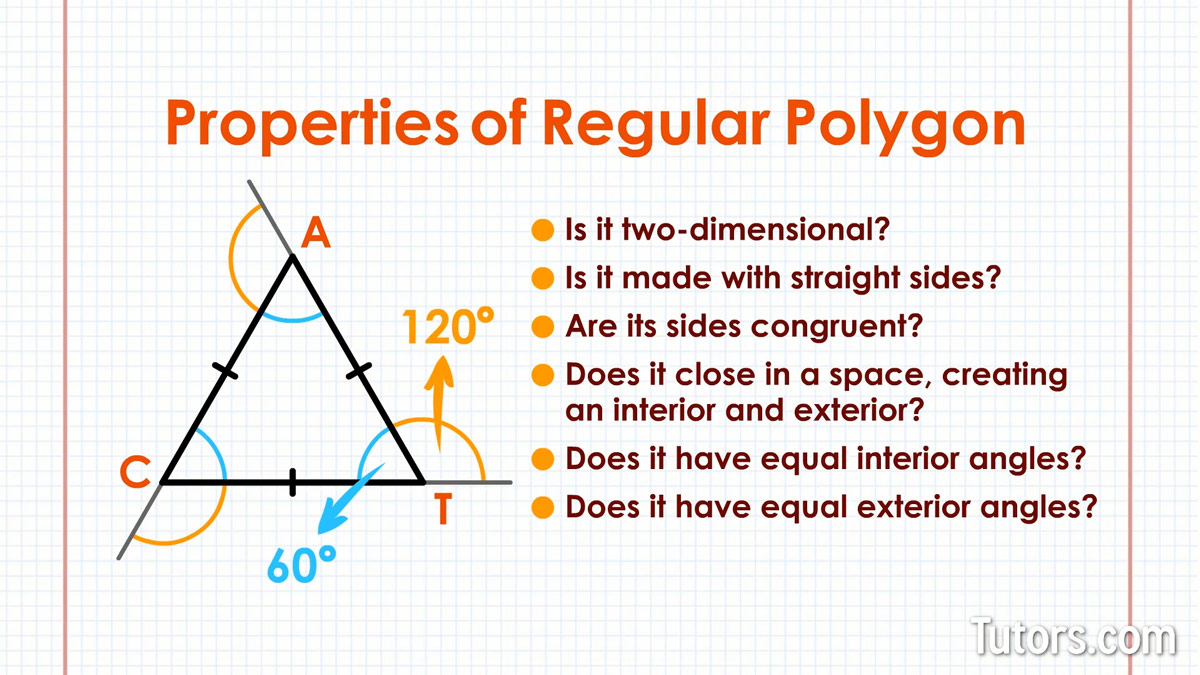
What Is A Regular Polygon
